There's a good chance you've hit play on a recording of yourself and thought, "do I really sound like that?" That reaction makes total sense. When you're singing, the voice you hear is partly carried through bone conduction — vibrations traveling through your skull — which makes it sound fuller and richer than it actually is. A recording strips that away and gives you what everyone else hears. It's uncomfortable, but that honesty is exactly what makes it useful.
Singing Recorder lets you record, play back, and save audio files right in your browser — no app download needed. All the audio processing happens on your device; nothing gets uploaded to a server. This guide walks through how to set things up, how to actually use it, and what to listen for when you play back what you recorded.
Before You Hit Record
Why browser-based recording
If opening a DAW or wiring up external gear adds friction to your practice, that friction adds up. The main advantage of recording in a browser is that it removes all of that. Chrome, Firefox, Safari — open a tab, allow mic access, and you're going. That's it.
Singing Recorder's audio engine is built on Web Audio API and MediaRecorder API — both standard browser technologies. Everything runs locally on your device, which means even if your internet connection drops mid-session, the recording keeps going.
Mic and environment checklist
You don't need an expensive condenser mic. A laptop's built-in microphone or the inline mic on a pair of earbuds is more than enough for practice purposes. That said, a few things are worth checking before you start.
Use headphones. When the monitoring feature is on (which lets you hear your own voice in real time), speakers will cause feedback — the mic picks up what the speakers put out, and you get that awful howling loop. Wired earbuds are the safest option. If you don't have any, either keep the monitoring volume very low or just skip monitoring altogether and listen back after.
Environment matters more than gear. AC units, refrigerator hum, traffic outside — microphones pick up more of that ambient noise than you'd expect. Play back a recording and you'll often hear the background louder than you anticipated. You don't need a soundproofed room, just the quietest space available to you.
Keep your mouth about 15–20cm from the mic. Too close and plosives (p, b sounds) turn into a blunt thud of air. Too far and the signal gets thin, which also hurts pitch detection accuracy if you're using the pitch monitor alongside this.
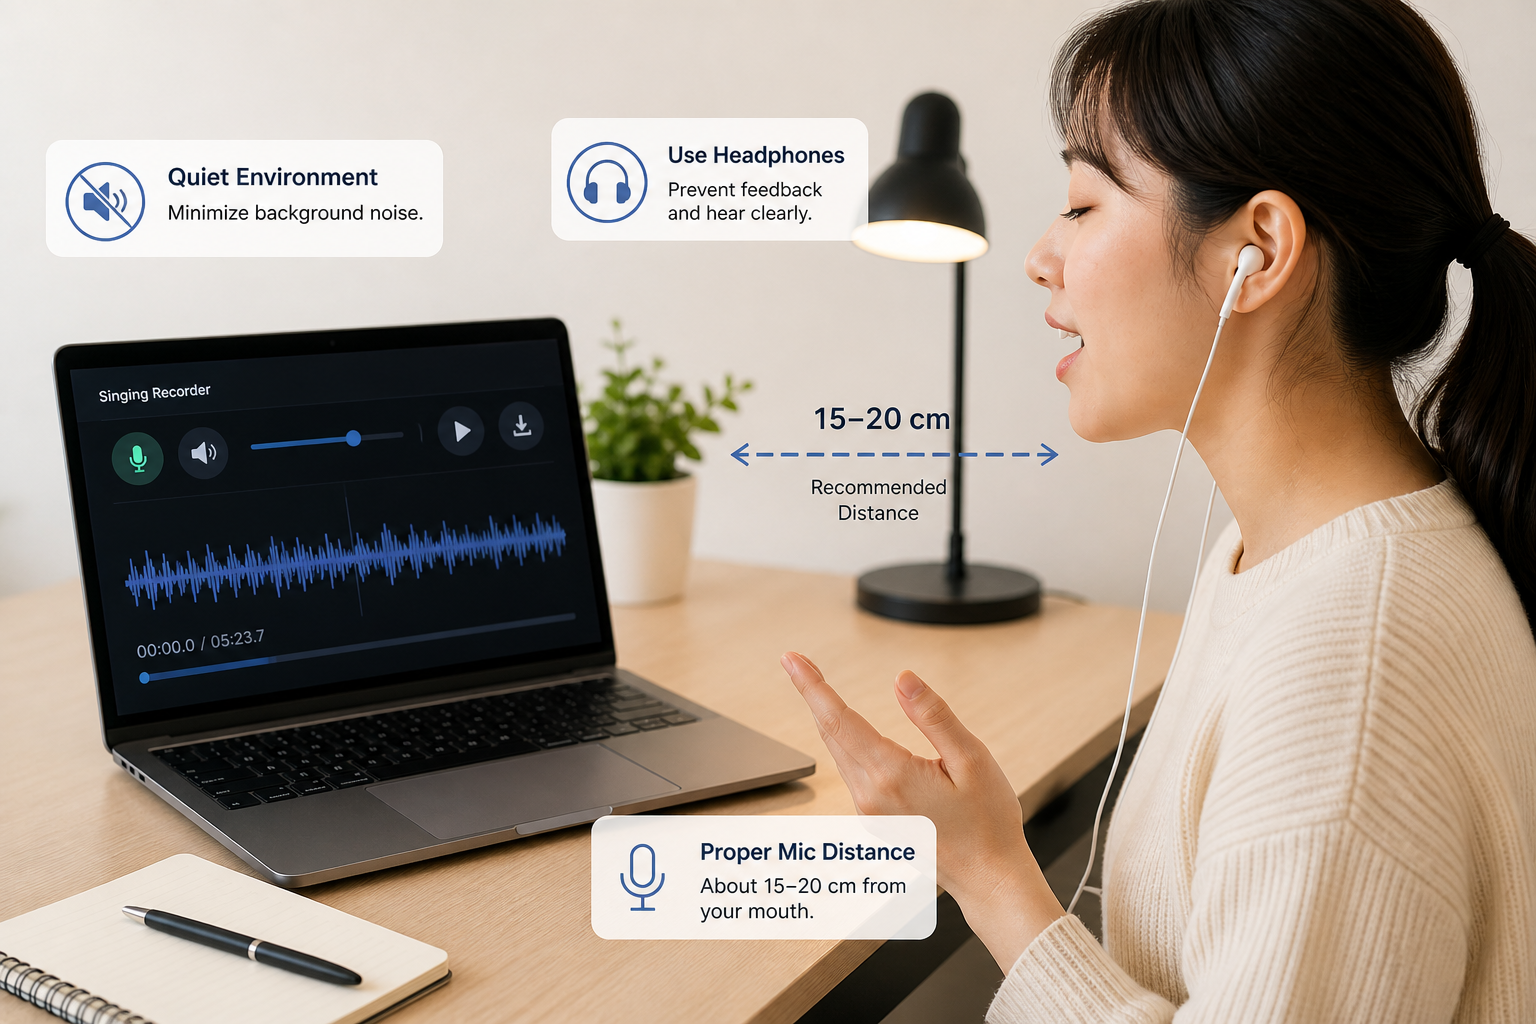
Quiet space, headphones, reasonable mic distance — these three things are the foundation of a usable recording.
Using Singing Recorder: Step by Step
Step 1 — Turn on the mic
Click the microphone icon in the control bar at the top of the page. Your browser will ask for mic permission — click "Allow." Once the icon switches to its active state, audio capture has started.
Note for iOS/Safari users: Audio may not activate immediately right after the page loads. If that happens, allow the permission and tap the mic button once more — that usually sorts it out.
Step 2 — Set up monitoring (optional)
Clicking the speaker icon next to the mic icon routes your voice back to your headphones in real time. Hearing yourself as you sing can help with pitch awareness, especially when you're working on a tricky passage.
Click the volume slider icon to set the monitor level anywhere from 0–100%. Start low — around 20–30% — and bring it up to wherever it feels comfortable without being distracting.
Plenty of people prefer to skip monitoring entirely and just listen back after. If hearing yourself in real time throws off your concentration, leave it off.
Step 3 — Record and stop
Once the mic is on, singing starts recording automatically. The current recording time shows up on the left side of the progress bar. You can record up to 10 minutes in a single take.
To stop recording, click the mic button again. The playback button will become active at that point.

Left to right: mic, monitor, monitor level, play/pause, upload, download, delete. Click or drag anywhere on the progress bar to jump to that point.
Step 4 — Upload an existing audio file and analyze it (optional)
If you already have a take on your device instead of recording fresh in Step 3, click the upload icon in the same control strip and choose a file. Singing Recorder analyzes the uploaded audio locally in your browser, then converts it into the same timeline/history format used for recorded takes.
That means once analysis completes, playback behaves like a finished recording: the progress bar, pitch-related history views, and range/spectrum playback tracking all run from the uploaded file's timeline.
Upload limits and format notes:
- Max duration: 10 minutes
- Max file size: 50MB
- Accepted picker type:
audio/*(actual decode support depends on your browser codec support) - If upload decode fails: convert to a common format like WAV or MP3 and try again
While analysis is running, transport and edit controls are temporarily blocked and a processing modal appears with progress. Use Cancel in that modal if you want to stop analysis mid-way.
Step 5 — Play back and navigate
Hit the play button to hear your take — whether you captured it in Step 3 or brought it in via Step 4. You can click or drag anywhere on the progress bar to jump straight to that moment. The timestamp displays in minutes:seconds.milliseconds format, so finding a specific section you want to re-examine is pretty easy.
The mic disables during playback. If you want to record again after listening, stop or let playback finish, then re-enable the mic. Starting a new recording will overwrite the previous take.
Step 6 — Download
Clicking the download button opens a format menu. Choose from WebM, MP3, WAV, OGG, or M4A, then tap "Download" to save the file to your device.
| Format | What it's good for |
|---|---|
| MP3 | Best compatibility. Sending to a teacher, posting online. |
| WAV | Near-lossless quality. Larger file, but good for keeping long-term. |
| WebM | Browser's native format. Fastest to save. |
| M4A | Convenient on iPhone and iPad. |
| OGG | Open-source format. Mostly for specific software use cases. |
For most purposes: MP3 when sharing, WAV when archiving.
Step 7 — Delete a take and how recordings are stored
Once you record or upload something, Singing Recorder keeps the take in your browser so it survives a page reload — you can return later in the day and replay or re-export without re-uploading the file. Two things are worth knowing about how that works:
- Local cache only. The audio bytes and a small metadata record are stored in your browser's IndexedDB on the device you're using. Nothing leaves your machine. Open a different browser or a different computer and the take won't be there.
- Auto-expiry after 1 day. A cached take is kept for up to 24 hours from when it was saved. After that, it's discarded automatically the next time you open the page. The app also tries to clear the cache when you close the tab or browser window — that part is best-effort (some browsers cut JavaScript short on close), but the 1-day expiry is the hard guarantee.
If you want to clear a take right away without waiting for the timeout:
- Tap the trash icon at the right end of the control strip. The button stays visible at all times so you always know where it is, and it only becomes active when there's a recording or upload to remove. Pressing it wipes the current take from the playback view and deletes the cached copy in the same step — there's no separate "clear cache" action to remember.
- Starting a new recording with the mic button also overwrites the previous take, so if you simply want to redo a phrase you don't have to delete first.
In short: takes survive a refresh, expire after a day, can be cleared instantly with the trash icon, and never travel beyond your device.
What to Actually Listen For
There's a real difference between passively playing back a recording and listening with a specific purpose. Trying to evaluate everything at once is a recipe for getting overwhelmed and not retaining anything. It's more effective to pick one thing per listening session and actually zero in on it.
Pitch — where are you losing it?
Pitch is usually the first thing that jumps out when you listen back. A passage that felt clean in the moment can sound flat or sharp on playback — again, because of that bone conduction effect that makes your voice sound better to yourself than it does to everyone else.
Things to listen for specifically:
- Ends of phrases. A lot of singers unconsciously relax at the end of a line, and the pitch drops with it (going flat). Check whether you're consistently landing your last notes or letting them sag.
- The approach to high notes. The trouble usually starts a note or two before the high note itself. Finding where the pitch first destabilizes gives you something concrete to work on next session.
- Vibrato consistency. If you use vibrato, listen for whether the oscillation stays even or starts to wobble unevenly at any point.
Opening Vocal Pitch Monitor alongside your next take lets you watch a real-time pitch graph while you sing. Small deviations that are hard to catch by ear alone show up clearly on the visual — useful for pinpointing exactly which notes are drifting.
Breath — is it working with you or against you?
Breath is one of those things that's harder to self-assess in the moment than you'd think. An inhale that feels natural while singing can turn out to be surprisingly audible on playback. On the other hand, a well-placed breath can actually serve the phrasing — so it's not automatically a problem.
Things worth noticing:
- Noisy inhales. If the breath sounds scratchy or harsh, it might be worth adjusting your distance from the mic or the timing of your breath.
- Phrase endings. Did you hold notes for their full value, or did they cut off earlier than expected? Running out of air tends to show up at the very end of a phrase.
- Legato connections. If you're going for a smooth, connected sound between notes but it's coming out choppy, the legato breaks are almost always breath breaks in disguise.
Tone — what's the actual quality of the sound?
Tone is subjective, but there are some things you can assess fairly objectively.
- Unintended nasality. "Singing through your nose" might be deliberate for a certain style, or it might be a habit you haven't noticed. High notes are where this tends to creep in most.
- Register transitions (chest to head voice). Check for abrupt breaks or sudden tone changes where registers shift. Vocal Spectrum makes this visible with log-frequency FFT bars, so you can compare how harmonic energy reorganizes across the transition.
- Breathiness. Sometimes intentional, sometimes not. If it's showing up only in certain phrases, that's usually a sign those are the spots where your vocal support is running thin.
Rhythm and diction — are notes landing where you expect them?
These are easy to overlook when you're focused on pitch and tone. Comparing your recording against the original track side by side is especially revealing here.
- Rushing or dragging. Notice if you're consistently entering early or late. Singing alongside Online Metronome on your next take — using the tap function to lock in the right tempo — will make any rhythmic tendencies very obvious.
- Consonant clarity. In fast passages, do consonants get swallowed? And in slower ones, are you over-emphasizing them to the point where they're breaking the line?
Making Recording Review a Habit
Don't try to fix everything at once
As Throga's research points out, the most effective approach is to go into each listening session with one specific focus. Decide before you hit play: "today I'm only listening to phrase endings." Then do it. Next time, breath support. The time after that, register breaks. You'll end up analyzing the same passage from multiple angles without burning yourself out.
Date your files
When you download, include the date and song title in the filename. Listening back two months later to a file named 20260505_practice_verse1.mp3 and actually hearing the difference from where you are now is a better motivator than any abstract progress chart. It also just makes things easier to find later.
Sending recordings to a coach
MP3 or WAV files exported from Singing Recorder can be shared through email, messaging apps, Google Drive — anywhere. If you're working with an online coach, this makes it easy to send a take for feedback without needing to schedule a synchronous session. It's also useful as an audition prep tool for documenting where you are at a specific point in time.
Using Singing Recorder as Part of a Practice Flow
Singing Recorder runs alongside the rest of the tools on MusicalBoard. Vocal Pitch Monitor and Vocal Spectrum stay active while you're recording, so you can track pitch and spectrum in real time, then review the same sections again on playback with synchronized spectrum history.
A practical example of how this fits together: use Virtual Piano to find your starting pitch, run through a phrase while watching the Vocal Pitch Monitor, and once it's feeling solid, switch to Singing Recorder to capture a full run-through. Play it back and check the one thing you decided to focus on for that session. If something stands out in a particular bar, jump directly to it on the progress bar and replay it a few times.
The whole loop stays in one browser tab. No switching apps, no re-opening anything — just the practice itself. That might sound like a small thing, but keeping the momentum of a practice session intact is actually kind of important.
The awkwardness of hearing yourself on a recording doesn't really go away. You just get used to it. And when you listen back to your first recording two months down the line, you'll realize how useful that awkward, honest record actually was.