Singers who practice diligently but cannot figure out why their progress stalls often share a common blind spot: they are not actually listening back to their own singing. The voice you hear while you sing contains a bone conduction component that is transmitted directly to the inner ear, making it sound richer and fuller than it actually is. What a microphone captures — the sound other people hear — is different. The only way to close that gap is to listen to recordings. And once you have a recording, concrete comparison and analysis have to happen before real improvement follows. This article covers the advantages of browser-based recording, exactly how to use the upload, playback, and comparison features, and a practical self-feedback workflow centered on MusicalBoard's Singing Recorder. No app installation. No account. One browser tab.
Why Self-Feedback Matters: Ear Alone Is Not Enough
One thing vocal coaches consistently emphasize is the habit of regularly recording your singing and listening back. The reason is simple: there is a structural difference between what you hear while singing and what ends up on a recording.
Bone conduction delivers vibration directly to the inner ear, so your own voice sounds fuller and richer to you — with more low-end emphasis than the sound actually has. A microphone picks up only what travels through the air, without the bone conduction component. The reaction "Is that really what I sound like?" when you first hear a recording is completely normal. Recognizing this gap and using recordings as your practice reference is the core of self-feedback.
There is also the matter of cognitive bandwidth. It is nearly impossible to monitor rhythm, pitch, diction, and breath simultaneously while you are singing. When listening to a recording, you can focus on one element at a time, which makes every problem far easier to catch.
Throga also shows that singers who regularly record and listen back progress faster than those who do not. Self-feedback is not optional — it is an essential component of practice.
The Advantage of Browser-Based Recording: Start Immediately, No Setup
Installing a DAW (Digital Audio Workstation) and configuring it for vocal practice carries real overhead — audio interface setup, driver installation, buffer size tuning. Getting a full recording rig working properly takes time.
Browser-based recording skips all of that. Open Chrome, Firefox, or Safari, grant microphone permission, and recording starts immediately. MusicalBoard Singing Recorder uses the Web Audio API and MediaRecorder API, and all audio processing happens on-device. Recording continues even if the internet connection drops, as long as the page is already open.
The biggest advantage is the absence of any setup step that interrupts your practice flow. The moment you think "I want to record this phrase right now and hear it back," you open one more tab. A laptop's built-in microphone or an inline earphone mic is more than sufficient for self-feedback purposes. You do not need high-end equipment.
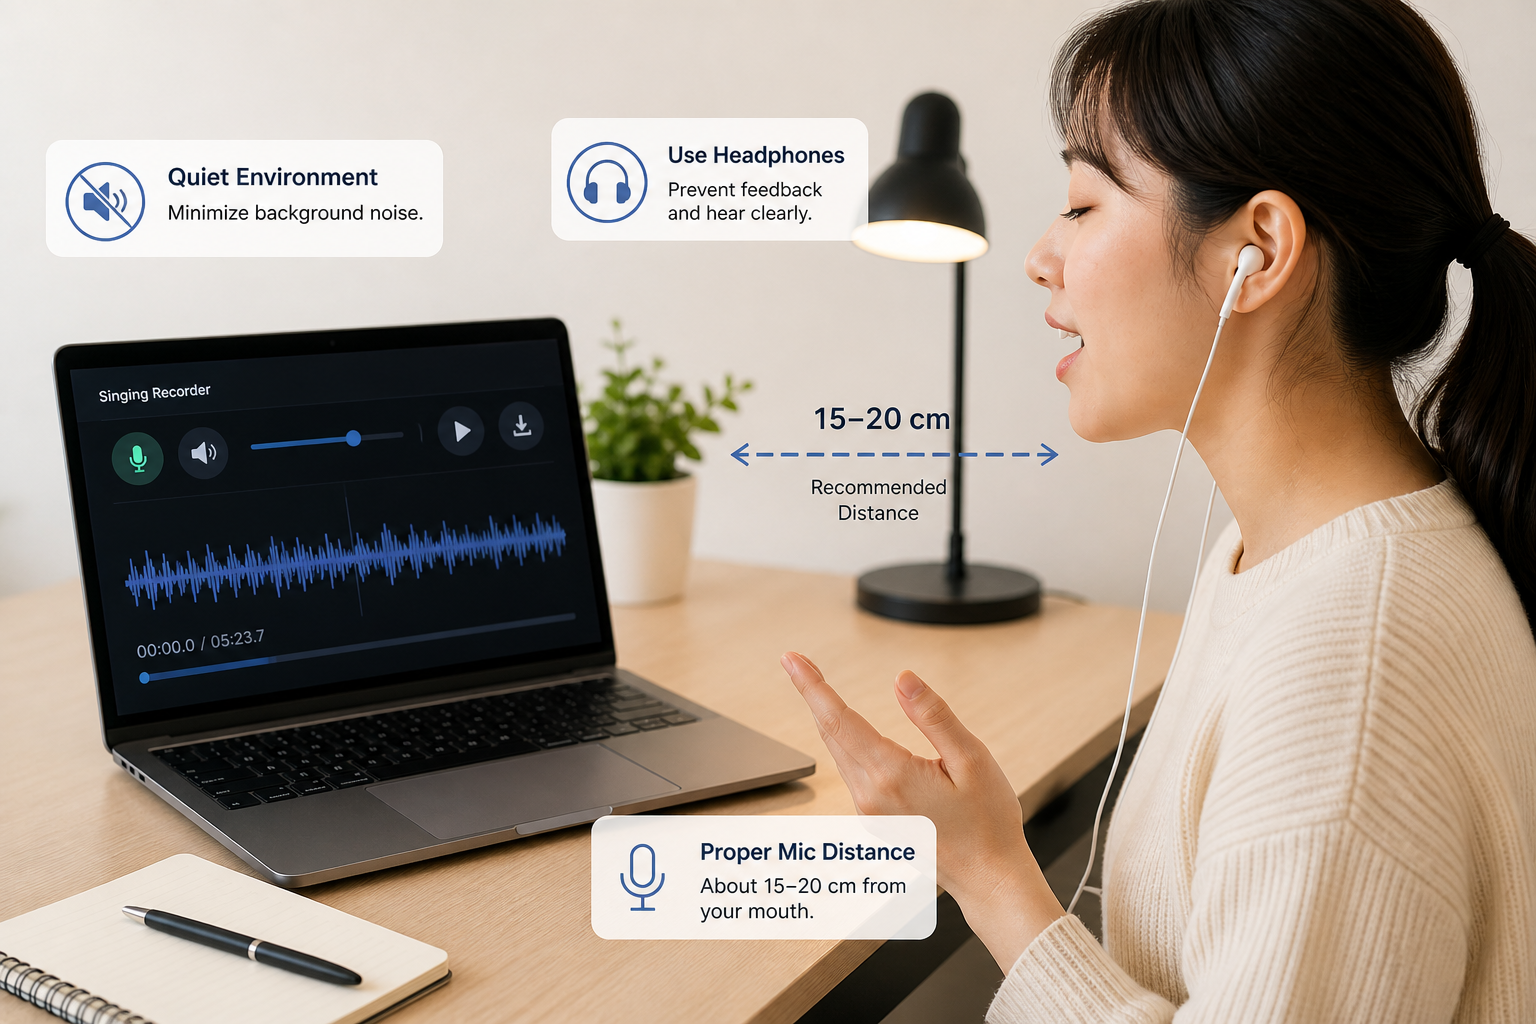
No installation needed — just open a browser tab. Grant microphone permission and recording begins.
The Upload Feature: Loading Existing Files into Singing Recorder
Beyond recording directly, Singing Recorder also lets you load audio files you already have. This is especially useful when you recorded on a smartphone or saved a file from another app.
To upload, click the upload icon in the control bar and select a file. The browser analyzes the audio locally, and once analysis is complete, the file appears on the playback timeline in exactly the same way as a directly recorded take.
Upload constraints:
- Maximum playback duration: 10 minutes
- Maximum file size: 50 MB
- Supported formats: any audio format the browser supports. If a file does not open, try converting it to WAV or MP3 first.
Uploaded files are treated identically to directly recorded takes. You can drag the progress bar, loop specific sections, choose a download format — all features work the same way. While analysis runs, a status window displays progress, and a cancel button stops the process if needed.
Playback: Dragging the Progress Bar to Jump to Any Point
Once recording or uploading is complete, press the play button to listen. The most useful aspect of Singing Recorder's playback is the ability to drag the progress bar to jump directly to any point in the take.
Listening from the beginning to the end every time is often inefficient. When there is a passage you felt was problematic, you need to jump straight to it and listen closely. The progress bar displays a timestamp in minutes:seconds:milliseconds, so you can position yourself precisely wherever you need to be.
The microphone is inactive during playback. To record again, stop or finish playback and press the microphone button again. Starting a new recording overwrites the previous take. For this reason, download any take you want to keep before beginning the next recording.
Comparison Workflow: Record the Same Phrase Twice and Alternate
One of the most powerful self-feedback methods is recording the same phrase twice and alternating between the two takes. Spot a problem, work on it deliberately, record again, and compare — the change is audible directly.
The practical comparison workflow follows this sequence.
Step 1: Record and download the first take Record a phrase that includes the passage you feel is problematic. When done, press the download button and save it as MP3 or WAV. Saving with a filename that includes the date and take number makes it easy to find later.
Step 2: Identify specific problems Play back the first take and identify which notes sound flat, where the rhythm wobbles, and where the diction is muddy. As Throga emphasizes, focus on one element per listen.
Step 3: Targeted practice on the problems Work specifically on the issues found. If a note sounds flat, open Vocal Pitch Monitor and drill that note while watching the real-time pitch graph. If rhythm is the issue, turn on Online Metronome and practice in time with the click.
Step 4: Record the second take After practice, record the same phrase again.
Step 5: Comparative listening Alternate between the first and second takes. Upload the first take file into Singing Recorder to compare, or play both in separate players side by side. Hearing an audible difference between the two takes is concrete evidence that improvement has actually occurred.
Recording the same phrase twice and alternating between them makes the before-and-after difference directly audible.
Loop Practice: Targeting a Section with Vocal Pitch Monitor Open Alongside
The most efficient way to improve a specific passage is loop practice — repeating a short section (two to four bars) and receiving feedback on every repetition. Using Singing Recorder and Vocal Pitch Monitor together makes loop practice far more concrete.
Setup:
- Open Singing Recorder and grant microphone access.
- Open Vocal Pitch Monitor in a second tab or window and grant microphone access.
- Arrange both windows side by side. (If screen space is tight, you can alternate between them.)
Running the loop:
- Record two to four bars in Singing Recorder.
- Check the pitch graph in Vocal Pitch Monitor and identify any unstable notes.
- Drill just those notes in isolation, adding Online Metronome or Virtual Piano as needed.
- Record again and compare.
Three to five repetitions of this loop produces clear improvement even on a short passage. This approach is far more efficient than repeating the full song from beginning to end.
You can also use Singing Recorder's progress bar to loop a specific section for repeated listening. Find the exact moment where a problem occurs (say, at 2:13) using the progress bar and listen to that spot repeatedly until you identify precisely what is going wrong.
Monitoring vs. Post-Recording Feedback: What Each Does
Singing Recorder also has a real-time monitoring feature — the ability to hear your own voice through headphones as you sing. This is distinct in purpose and use from post-recording playback feedback.
Real-time monitoring is useful for getting immediate pitch feedback while you are singing. Listening through headphones removes the bone conduction component, making pitch drift easier to notice in the moment. That said, browser-based monitoring introduces approximately 30 ms of latency. This is not a problem for slow passages, but at faster tempos the latency can disrupt your rhythmic feel — so it is best to disable monitoring when practicing fast phrases. Monitoring must only be used with headphones; enabling it through speakers will cause feedback (howling).
Post-recording playback feedback does what real-time monitoring cannot: listening carefully after the performance ends, looping specific sections, comparing two takes, and cross-referencing pitch graphs for analysis. Problems that are impossible to catch in real time surface in the playback.
Using both approaches is ideal. Real-time monitoring maintains a broad sense of pitch while singing; post-recording playback provides the detailed analysis.
MusicalBoard Singing Recorder: Complete Feature Overview
Here is a summary of the main features of MusicalBoard Singing Recorder.
Microphone recording: Click the microphone icon to begin recording. Maximum take length is 10 minutes. Clicking the microphone button again stops recording and activates the play button.
Audio file upload: Click the upload icon to load an audio file stored on your device. The file is analyzed locally, and once analysis completes, it appears on the playback timeline.
Playback and Progress Bar: Press play to listen to a recorded or uploaded take. Click or drag the progress bar to jump immediately to any point.
Monitoring toggle: Click the speaker icon to enable real-time monitoring. There is approximately 30 ms of latency, so always use headphones — never speakers.
Monitoring volume: Adjust with the monitoring volume slider in a 0–100% range. Starting at 20–30% and adjusting to a comfortable level is recommended.
Download: Clicking the download button opens a format selection dialog. Choose from WebM, MP3, WAV, OGG, and M4A. MP3 is suitable for sharing; WAV is recommended for archiving.
Delete: Clicking the trash icon immediately deletes the current take. Deletion cannot be undone — download anything you want to keep before deleting.
Local cache storage: Recorded or uploaded files are saved in the browser's IndexedDB and persist across page refreshes. Files are automatically deleted after 24 hours.

Left to right: microphone, monitor, monitor volume, skip back 10 seconds, play/pause, skip forward 10 seconds, upload, download, delete. Drag the progress bar to jump to any point in the take.
Combining with Other Tools
Singing Recorder's effectiveness multiplies when used alongside other MusicalBoard tools.
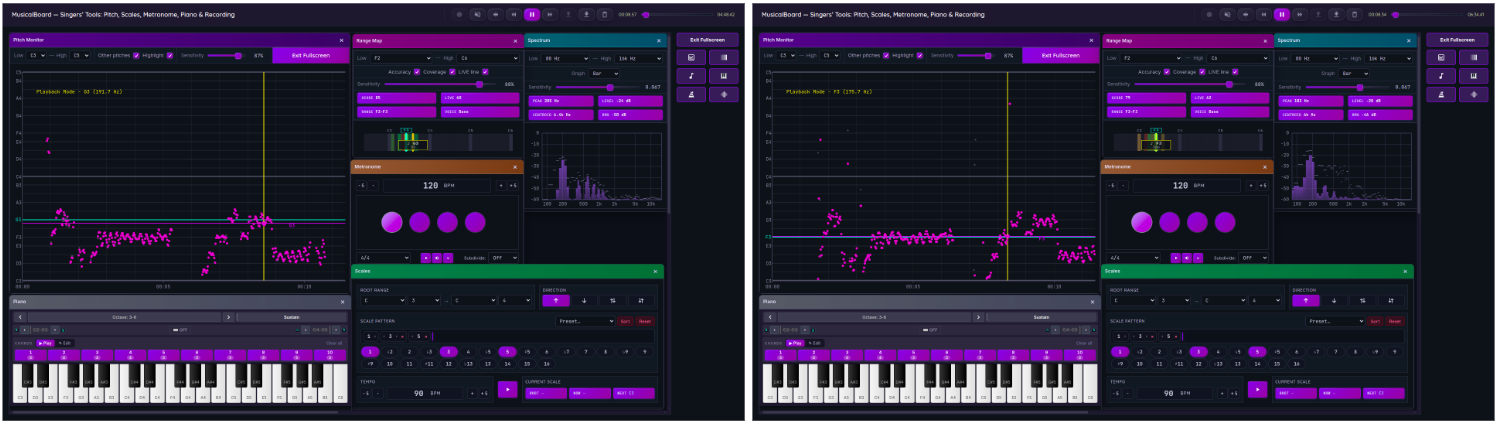
With Vocal Pitch Monitor: Opening Vocal Pitch Monitor at the same time lets you watch the real-time pitch graph while recording. Identify which notes show pitch drift visually, then replay the recording to confirm your analysis with your ears.
With Vocal Range Test: Running Vocal Range Test first to map your current range gives useful context when listening back. You can pinpoint whether pitch instability in the recording tends to cluster in a particular part of your range — especially around the upper limit of your usable range.
With Online Metronome: When playback reveals rhythmic problems, turn on Online Metronome and practice the passage in time with the click, then record again. Comparing recordings made before and after metronome practice makes the improvement in rhythmic stability audible.